

In this thread, I'll be posting updates on the work being done on Gray Ghost. In a nutshell, the project will involve fixing some existing problems with the car, upgrading the suspension and underpinnings and replacing the factory 301 with a mildly built Pontiac 400. My buddy Kevin ('Hooper' here on FBN) is coordinating the work from his shop in Lake Charles, LA. We trailered Ghost over Thanksgiving weekend to his location all while exhibiting LadyHawk back in Houston at AutoRama.
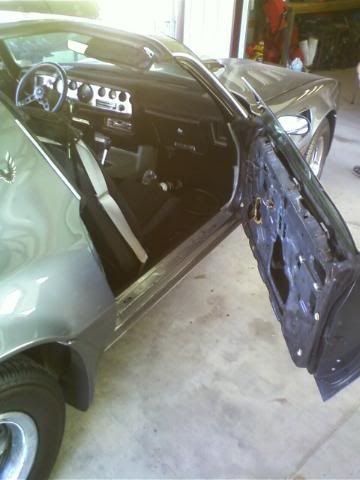
Kevin and his crew got the passenger door open for the first time since 2007. He reports that the striker plate is damaged as is the latch mechanism. Those will be repaired/replaced and the door hinges for both doors will be rebuilt with new pins and bushings.
![Image]()
Earlier, I had ordered some components for the makeover.
Here are the solid aluminum front subframe mounts:
![Image]()
I got them from Ram Air Restoration Enterprises, Inc., along with a set of subframe connectors:
http://www.ramairrestoration.com/catalog/product_info.php?cPath=31_30&products_id=272
and Y-Braces:
http://www.ramairrestoration.com/catalog/product_info.php?cPath=31_30&products_id=252
Kevin and his crew got the passenger door open for the first time since 2007. He reports that the striker plate is damaged as is the latch mechanism. Those will be repaired/replaced and the door hinges for both doors will be rebuilt with new pins and bushings.
Earlier, I had ordered some components for the makeover.
Here are the solid aluminum front subframe mounts:

I got them from Ram Air Restoration Enterprises, Inc., along with a set of subframe connectors:
http://www.ramairrestoration.com/catalog/product_info.php?cPath=31_30&products_id=272
and Y-Braces:
http://www.ramairrestoration.com/catalog/product_info.php?cPath=31_30&products_id=252
.gif?auto=webp&fit=bounds&format=pjgp&height=1920&optimize=high&width=1920)


