DISCLAIMER: I wrote this thread a while back on thirdgen.org... I had positive feedback so I felt as if I would share it with you.
Hey everyone.
Every now and again I like to write "how tos" to help everyone out. For people that are budget constraint I decided to experiment with a paint kit. Now, here is a disclaimer: This is in no way professional, or what you should do, but if..... you wanted to here is how. I will paint my car again next year. But I really wanted to see what this new paint I found was all about.
List of materials:
1. Arylic Enamel Paint kit (Candy Apple Red) $89
2. 3 rattle cans of "urethane" primer (I chose dupicolor. Do not use cheapo)$15
3. 5 Packs of Large sheets of 220 grit sand paper $10
4. 3 Packs of Large sheets of 100 grit sand paper $6
5. 3 Smaller packs of 320 grit $6
6. HVLP paint gun with adjustable reg and double filter $45
7. Small can of Bondo $6
8. Tube of spot putty $5
9. Pack of plastic putty knives
10. One Stainless putty knife $3
11. Gallon of denatured Alcohol $11
12. 2 Rolls of masking tape $4
13. Quart of wax and degreaser $5
14. 3M Face respirator $25-$40 Mine was $90 but I do this stuff alot.
15. Sanding block $3
16. Electric sander $13
17. Box rubber gloves $5
I set the time for less than a week. I have my own paint booth and stuff and not everyone does so be creative. This is to get the job done.
The first step is to wash your car like never before. This is where dish detergent is your friend. Wash your car the best that you can.
Second step is to rub your wax and grease remover all over the car. Reason being is so you do not embed wax or grease in your paint, also the reason we washed it in the first place.
Now survey your car.... look at it and make a list of things you have to do. it helps to sketch your car and mark where dents are.
Next step is to dismantle parts that need to be painted seperately.
I removed the following:
1. Gas cover
2. Gas filler catcher
3. Spoiler
4. Rear hatch
6. Rear turn signals
7. Tail lights
8. Hood
You could remove:
The doors
side mirriors (you really should but I am really pressed for time since this is my Daily Ride
Front turn signals (you should but I have alot of stuff in the fender areas so I masked them.
Make sure you label all the hardware you used to remove anything.
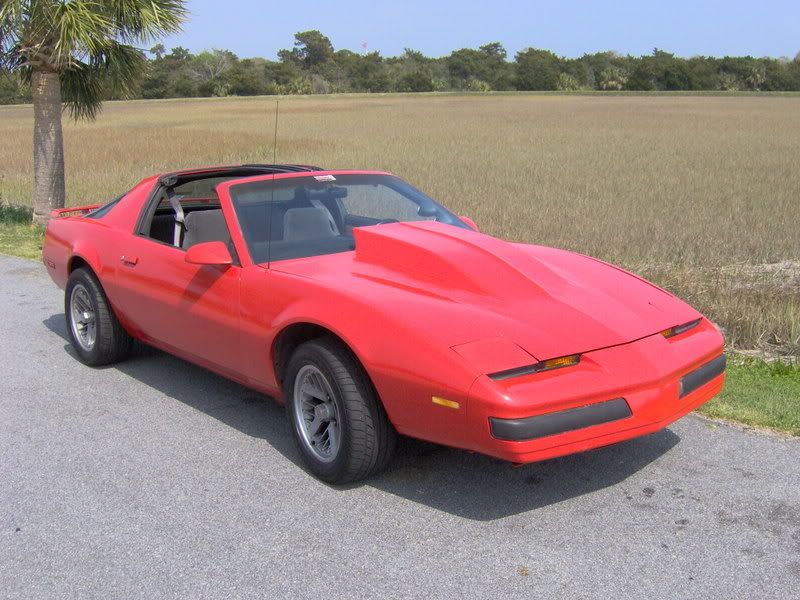
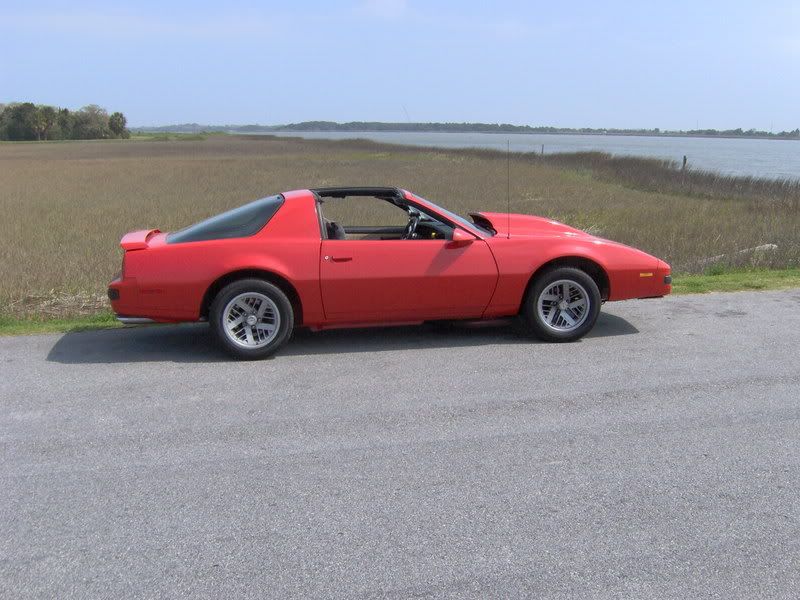
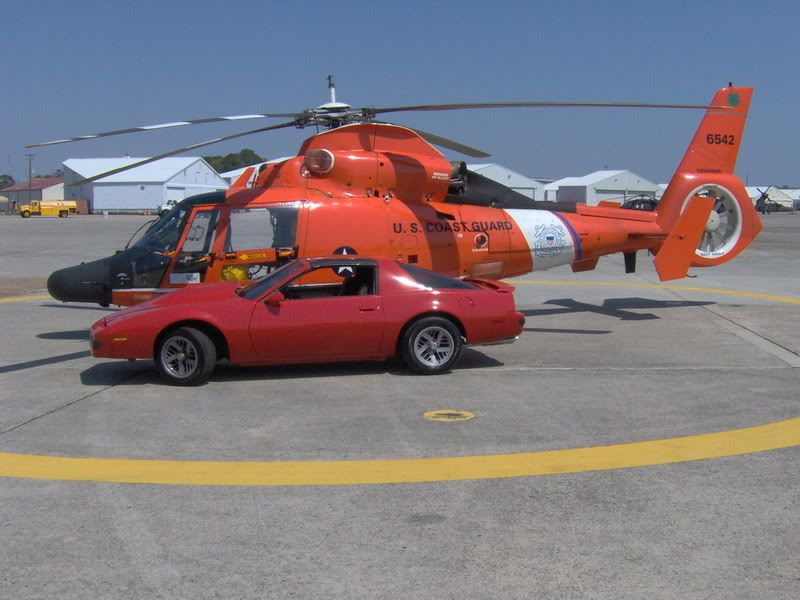
Here is what I started out with:
![Image]()
![Image]()
![Image]()
Mask off all the areas that need masking.... windows, hatch etc..
So the main concern now is getting the clear coat off. This stuff is as tough as nails. Break out the electric jitter bug and go to town with 100 grit sheets. lightly break all the clear off. You are not trying to make it show room smooth right now you are breaking the barriers so we can shape it later.
You will look like this:
![Image]()
![Image]()
![Image]()
Once now you get the clear off you need to look at your car again and make notice of the body lines. I like to take a piece of making tape to put it along the sharp edge of a body line to help guide your sanding. Take your sanding block and work some 100-150 grit left to right on a side and get the feel for the body. You will start to see high and low areas.
The darker areas are usually the lower areas and you will need to fill them. The whiter areas are usually the higher areas, you can tap them down with a hammer or if they aren't that bad sand them completely down If you get to bare metal do not sweat it.
The object is to use as much of the original primer as possible.
While you are sanding you will see alot of pin holes, chips and scratches. When you come across these while sanding, take a piece of sand paper and sand the inside the best you can of the imperfection and clean it with alcohol.
Grab a scraper/ spreader and dab a bit of the spot putty in it. You do not want to merely wipe off the excess you want to press it in while remove the excess. Let it dry for 30 minutes and decide if you need to do it again.
This is what it looks like after filling in a few chips and what not. (front fascias are a huge chip environment.
![Image]()
![Image]()
If you have alot in a single area, and you think you have to really smear it on then use the bondo. Bondo is very strong if you use it the way it was designed. If you pile it on an inch thick it will crack, 1/8th inch is the max in my opinion.
After body filler you need to put your primer over it. The urethane primer is great. Very moisture resistant, and plays well with others. Put a nice coat of primer over areas that need it such as edges of hoods, body lines, bumpers (prone to spider cracks)
Corrosion:
I was lucky I had no rust spots, but if you come across any you need to remove all the rust until the metal is basically shiny. If you get down to that point you can use some self etching primer and prime the bare metal. You cannot sand self etching primer so you will need to put your urethane primer over the top. Reason being, self etching primer has an acid that eats its' way into the metal to adhere. Since you cannot sand self etching primer you use the urethane to cover it enough to be able to sand it. If you perfer you can use epoxy primer instead of self etching primer but you still can not stand epoxy primer and will need to urethane it anyways.
This is a very time consuming, exhausting, and boring task. Body work is not really all that fun. However it is a little cheeseball or cliche for me to say but it is true. It is 95% the work of a paint job. I know you will want to get it done as fast as you can but you will pay for halfassing.
Your paint's primary function is to protect your car so now is a good time to do it right.
Ocassionally wipe the car down with alcohol and skim your hand down and feel for uneven areas, chips, pinholes, etc.
I know you guys are dying to know exactly why is my paint soooo..... cheap. Well, you will see alot of advertising for acrylic paint kits. Which are catalyzed, enamels to be confused with old enamels. You get a kit that consist of, one gallon paint your choice, one pint hardner one quart reducer medium dry speed. Ratio 4:1:1
4 parts paint, 1 part reducer, 1 part hardner.
This is one stage paint, no clear.
You also get a measuring cup, a few stir sticks, and some paint funnels.
So basically I am taking one for the team, and trying this out. This is a temporary paint job, but the results depend on YOU, you can make any paint look good. If you get runs, sags, dull paint. You can wait a week then rub out any imprefections with wetsand paper and then simply buff it to a insane gloss. You will be surprised with the results I assure you
![Image]()
My car is still not done yet, I am on day 3 and hope to shoot it thursday. More pics to come so stay tuned.
Okay moving on:
Here you can see where there is a need for some body filler. This is my hood and well there was a pretty good creased dent in the tip. Normally you would like to hammer out as much as you can however the back side has the hood ribbing so that would not work out. You could always use a slide hammer but.... this is really small.
Take your area down to bare metal. Body filler adheres very well to bare metal and epoxy primer.
![Image]()
Now you need to mix your body filler. I like to use a piece of sheet metal because you can use it again and again. Mixing body filler is easy. A golf ball size of filler only requires 1 1/2" inchs or so of hardner. You must add the right amount of hardner, adding more than enough will not make the filler dry quicker it will actually weaken it because the extra hardner never dries.
![Image]()
Once mixed dab a good amount on the area like so.
![Image]()
Then take your scraper or filler knife and just shape it and remove the excess.
![Image]()
Depending on the temp of your environment it can take 20-60 minutes to dry.
So when it does, you need to remove the remaining excess filler and shape it. For massives amounts of filler you want to use a grater but, we do not need it for this. I used some 80 grit paper and a block and blocked it. Then worked it with 220, then finally with 320 grit. Afterwards make sure you prime the area 2-3 times.
Here is an example of a low spot I found. On the rear deck lid while blocking I noticed a darker spot. It happens to be a crease from the spoiler. It isnt deep at all so what do we do? Spot putty.
There are two ways to use it here is number one. Rough up the area with some rough grit.
![Image]()
Squeeze some putty in.
![Image]()
Then smooth it out, remember to press it in and not wipe it in.
![Image]()
Let it dry and block it, then feather it.
The other way to use spot putty is well... for chips and such.
Find your chip(s)
![Image]()
Rub some putty on the chips
![Image]()
Take off the excess with the putty knife.
![Image]()
Let it dry then sand with 320. If you happen to have alot in one area then some primer would be wise.
Okay gents... here is what you have been waiting for. The car is officially painted. I painted the entire car with 6 coats and used only half a gallon if that. This stuff is thinner than water.
Overall quality I am so-so, reason being it is 45* outside and you are suppose to paint when it is 75*-80* Guess what happens if you do it in the cold? Orange peel. Yep.
It is bittersweet because I get to rub it out to show you guys how to rub out a one stage paint to make it look two stage anyways. But no matter what... we have acomplished the goal. To make your car better than it was for $250.
My car had 95% clear coat gone.... dings everywhere.... ugly side molding.... everything. I have enough paint to do one more car too. I used only 10% of my mini can of body filler 10% of the spot putty and have more than half of my sand paper. So basically you can do two jobs for $250
Here is the pics.
![Image]()
![Image]()
![Image]()
![Image]()
Wait until next weekend I will rubout the paint and show you better quality. I will reassemble the car monday.
Here was my kit
![Image]()
Here were my supplies in a nut shell
![Image]()
Here is what it looks like now... I changed the color but same price...
![Image]()
![Image]()
![Image]()
Hey everyone.
Every now and again I like to write "how tos" to help everyone out. For people that are budget constraint I decided to experiment with a paint kit. Now, here is a disclaimer: This is in no way professional, or what you should do, but if..... you wanted to here is how. I will paint my car again next year. But I really wanted to see what this new paint I found was all about.
List of materials:
1. Arylic Enamel Paint kit (Candy Apple Red) $89
2. 3 rattle cans of "urethane" primer (I chose dupicolor. Do not use cheapo)$15
3. 5 Packs of Large sheets of 220 grit sand paper $10
4. 3 Packs of Large sheets of 100 grit sand paper $6
5. 3 Smaller packs of 320 grit $6
6. HVLP paint gun with adjustable reg and double filter $45
7. Small can of Bondo $6
8. Tube of spot putty $5
9. Pack of plastic putty knives
10. One Stainless putty knife $3
11. Gallon of denatured Alcohol $11
12. 2 Rolls of masking tape $4
13. Quart of wax and degreaser $5
14. 3M Face respirator $25-$40 Mine was $90 but I do this stuff alot.
15. Sanding block $3
16. Electric sander $13
17. Box rubber gloves $5
I set the time for less than a week. I have my own paint booth and stuff and not everyone does so be creative. This is to get the job done.
The first step is to wash your car like never before. This is where dish detergent is your friend. Wash your car the best that you can.
Second step is to rub your wax and grease remover all over the car. Reason being is so you do not embed wax or grease in your paint, also the reason we washed it in the first place.
Now survey your car.... look at it and make a list of things you have to do. it helps to sketch your car and mark where dents are.
Next step is to dismantle parts that need to be painted seperately.
I removed the following:
1. Gas cover
2. Gas filler catcher
3. Spoiler
4. Rear hatch
6. Rear turn signals
7. Tail lights
8. Hood
You could remove:
The doors
side mirriors (you really should but I am really pressed for time since this is my Daily Ride
Front turn signals (you should but I have alot of stuff in the fender areas so I masked them.
Make sure you label all the hardware you used to remove anything.
Here is what I started out with:


Mask off all the areas that need masking.... windows, hatch etc..
So the main concern now is getting the clear coat off. This stuff is as tough as nails. Break out the electric jitter bug and go to town with 100 grit sheets. lightly break all the clear off. You are not trying to make it show room smooth right now you are breaking the barriers so we can shape it later.
You will look like this:


Once now you get the clear off you need to look at your car again and make notice of the body lines. I like to take a piece of making tape to put it along the sharp edge of a body line to help guide your sanding. Take your sanding block and work some 100-150 grit left to right on a side and get the feel for the body. You will start to see high and low areas.
The darker areas are usually the lower areas and you will need to fill them. The whiter areas are usually the higher areas, you can tap them down with a hammer or if they aren't that bad sand them completely down If you get to bare metal do not sweat it.
The object is to use as much of the original primer as possible.
While you are sanding you will see alot of pin holes, chips and scratches. When you come across these while sanding, take a piece of sand paper and sand the inside the best you can of the imperfection and clean it with alcohol.
Grab a scraper/ spreader and dab a bit of the spot putty in it. You do not want to merely wipe off the excess you want to press it in while remove the excess. Let it dry for 30 minutes and decide if you need to do it again.
This is what it looks like after filling in a few chips and what not. (front fascias are a huge chip environment.


If you have alot in a single area, and you think you have to really smear it on then use the bondo. Bondo is very strong if you use it the way it was designed. If you pile it on an inch thick it will crack, 1/8th inch is the max in my opinion.
After body filler you need to put your primer over it. The urethane primer is great. Very moisture resistant, and plays well with others. Put a nice coat of primer over areas that need it such as edges of hoods, body lines, bumpers (prone to spider cracks)
Corrosion:
I was lucky I had no rust spots, but if you come across any you need to remove all the rust until the metal is basically shiny. If you get down to that point you can use some self etching primer and prime the bare metal. You cannot sand self etching primer so you will need to put your urethane primer over the top. Reason being, self etching primer has an acid that eats its' way into the metal to adhere. Since you cannot sand self etching primer you use the urethane to cover it enough to be able to sand it. If you perfer you can use epoxy primer instead of self etching primer but you still can not stand epoxy primer and will need to urethane it anyways.
This is a very time consuming, exhausting, and boring task. Body work is not really all that fun. However it is a little cheeseball or cliche for me to say but it is true. It is 95% the work of a paint job. I know you will want to get it done as fast as you can but you will pay for halfassing.
Your paint's primary function is to protect your car so now is a good time to do it right.
Ocassionally wipe the car down with alcohol and skim your hand down and feel for uneven areas, chips, pinholes, etc.
I know you guys are dying to know exactly why is my paint soooo..... cheap. Well, you will see alot of advertising for acrylic paint kits. Which are catalyzed, enamels to be confused with old enamels. You get a kit that consist of, one gallon paint your choice, one pint hardner one quart reducer medium dry speed. Ratio 4:1:1
4 parts paint, 1 part reducer, 1 part hardner.
This is one stage paint, no clear.
You also get a measuring cup, a few stir sticks, and some paint funnels.
So basically I am taking one for the team, and trying this out. This is a temporary paint job, but the results depend on YOU, you can make any paint look good. If you get runs, sags, dull paint. You can wait a week then rub out any imprefections with wetsand paper and then simply buff it to a insane gloss. You will be surprised with the results I assure you
.gif?auto=webp&fit=bounds&format=pjgp&height=1920&optimize=high&width=1920)
My car is still not done yet, I am on day 3 and hope to shoot it thursday. More pics to come so stay tuned.
Okay moving on:
Here you can see where there is a need for some body filler. This is my hood and well there was a pretty good creased dent in the tip. Normally you would like to hammer out as much as you can however the back side has the hood ribbing so that would not work out. You could always use a slide hammer but.... this is really small.
Take your area down to bare metal. Body filler adheres very well to bare metal and epoxy primer.

Now you need to mix your body filler. I like to use a piece of sheet metal because you can use it again and again. Mixing body filler is easy. A golf ball size of filler only requires 1 1/2" inchs or so of hardner. You must add the right amount of hardner, adding more than enough will not make the filler dry quicker it will actually weaken it because the extra hardner never dries.

Once mixed dab a good amount on the area like so.

Then take your scraper or filler knife and just shape it and remove the excess.

Depending on the temp of your environment it can take 20-60 minutes to dry.
So when it does, you need to remove the remaining excess filler and shape it. For massives amounts of filler you want to use a grater but, we do not need it for this. I used some 80 grit paper and a block and blocked it. Then worked it with 220, then finally with 320 grit. Afterwards make sure you prime the area 2-3 times.
Here is an example of a low spot I found. On the rear deck lid while blocking I noticed a darker spot. It happens to be a crease from the spoiler. It isnt deep at all so what do we do? Spot putty.
There are two ways to use it here is number one. Rough up the area with some rough grit.

Squeeze some putty in.

Then smooth it out, remember to press it in and not wipe it in.

Let it dry and block it, then feather it.
The other way to use spot putty is well... for chips and such.
Find your chip(s)

Rub some putty on the chips

Take off the excess with the putty knife.

Let it dry then sand with 320. If you happen to have alot in one area then some primer would be wise.
Okay gents... here is what you have been waiting for. The car is officially painted. I painted the entire car with 6 coats and used only half a gallon if that. This stuff is thinner than water.
Overall quality I am so-so, reason being it is 45* outside and you are suppose to paint when it is 75*-80* Guess what happens if you do it in the cold? Orange peel. Yep.
It is bittersweet because I get to rub it out to show you guys how to rub out a one stage paint to make it look two stage anyways. But no matter what... we have acomplished the goal. To make your car better than it was for $250.
My car had 95% clear coat gone.... dings everywhere.... ugly side molding.... everything. I have enough paint to do one more car too. I used only 10% of my mini can of body filler 10% of the spot putty and have more than half of my sand paper. So basically you can do two jobs for $250
Here is the pics.


Wait until next weekend I will rubout the paint and show you better quality. I will reassemble the car monday.
It is not the same company but it is exactly the same. It is all you need. That paint stores very well. If you do not mix it and even after you open it you can have it for a long time.89 Iroc Brent;3202883 said:
Here was my kit

Here were my supplies in a nut shell

Here is what it looks like now... I changed the color but same price...